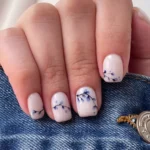
Having beautifully styled hands can instantly lift your confidence, and one of the best ways to achieve that is through durable enhancements. Among the many techniques available, this method is admired for its shine, strength, and versatility. While most people prefer getting it done professionally, learning to do it yourself at home can be both rewarding and cost-effective.
Table of Contents
The process may feel overwhelming at first, but with the right preparation, tools, and a little patience, anyone can create salon-worthy results. Here’s a detailed, step-by-step guide to help you get started safely.
Step 1: Prepare Your Workspace and Tools
Before you begin, make sure your workspace is clean, bright, and comfortable. Hygiene is essential when dealing with nail care, so disinfect your tools and wipe down your surface.
You’ll need:
- A file and buffer
- Cuticle pusher
- Dehydrator or rubbing alcohol
- Primer
- Base coat
- Extension tips or forms
- Builder gel or hard gel
- Curing lamp
- Top coat
- Lint-free wipes
Having everything laid out before you start will make the process smoother and more enjoyable.
Step 2: Prep Your Natural Nails
Your natural nails need to be properly prepared for the enhancement to last. Remove any polish, oils, or dirt. File the edges to your desired shape and lightly buff the surface to remove shine.
Gently push back cuticles to maximize the nail bed surface. Avoid cutting too much skin, as this could lead to discomfort or infection. Once the nails are cleaned and shaped, swipe them with dehydrator or alcohol to remove oils.
Step 3: Attach Tips or Forms
You can extend length in two main ways:
- Forms: Placed underneath the free edge, they provide a guide for sculpting. This method is flexible and allows more customization.
- Tips: Pre-shaped plastic pieces glued onto your nail before adding product. They’re quick and easy to use, making them great for beginners.
Choose whichever method you feel most comfortable with. Once applied, blend and shape them carefully so they look seamless with your natural nail.
Step 4: Apply the Base Layer
Apply a thin coat of base product to protect the natural nail and ensure strong adhesion. Keep the application thin and even, avoiding flooding around the cuticles. Cure under your lamp as directed.
Step 5: Build the Structure
This is where you’ll create the desired length and strength. Using a small bead of builder gel, place it at the center and guide it toward the edges and tip. Work in thin layers, curing between each one.
If you’re sculpting with forms, extend the product outward to create your length. If you’re using tips, focus on coating the surface evenly to strengthen them.
Building in layers instead of one thick coat ensures durability and reduces the risk of cracking or lifting.
Step 6: Refine the Shape
After your final cure, wipe away the sticky layer with a lint-free wipe soaked in alcohol. Then use your file to refine the edges and shape the nail exactly how you want—square, almond, coffin, or round. Buff the surface until smooth.
This step makes all the difference in how polished the final result will look.
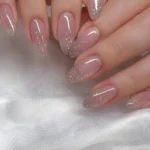
Step 7: Seal with Top Coat
Apply a thin, even layer of top coat. This will lock everything in place and provide that beautiful glossy finish. Cure one final time under the lamp. After curing, wipe if necessary to remove residue.
Step 8: Hydrate and Care
Massage nourishing oil around the cuticle area to restore moisture and softness. Finish with a layer of hand cream to replenish hydration.
Remember that maintenance is key. Avoid using your nails as tools, wear gloves when cleaning, and reapply oil regularly. With proper care, your extensions will last weeks without chipping or peeling.
Extra Safety Tips
- Always follow curing times—under-curing leads to weakness, over-curing to brittleness.
- Work in thin layers to prevent heat spikes.
- Never peel or rip off the product; this can damage the natural nail. Always soak off properly when removing.
- If you notice irritation or unusual discomfort, stop and seek professional help.
Why Practice Makes Perfect
The first few times may not look perfect, and that’s completely normal. With every application, you’ll gain more control over product placement, shaping, and finishing. Don’t be discouraged—practice leads to professional-looking results.
Final Thoughts
Learning to apply this type of enhancement at home can feel like mastering a new art form. With careful preparation, attention to detail, and consistent aftercare, you can enjoy long-lasting, glossy nails without frequent salon visits. It’s not just about beauty—it’s about giving yourself the freedom to express creativity and style in your own space.